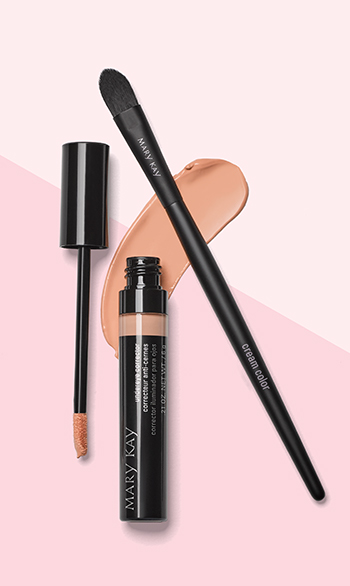
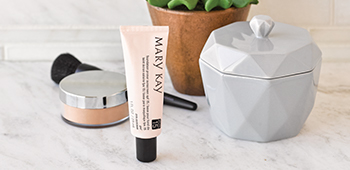
How to Apply Concealer

Concealer might just be the MVP of your makeup kit: The formula brightens undereye circles, camouflages everything from pimples and age spots to redness and hyperpigmentation, and lets us reflect an even complexion while our skin care products work behind the scenes.

But the key to achieving all this magic is application – apply too much, forget to blend, or (cringe emoji) apply the wrong shade, and you could be shining a spotlight on certain elements rather than helping them fade into the background. Keep reading for the best advice from our makeup artists to make sure you, too, apply like a pro.

Mary Kay foundation primer sits atop a marble bathroom countertop alongside mineral powder foundation, a makeup brush, gray beauty container and succulent plant.

Tip #1: Prime

A crucial first step, wearing a primer doesn't just extend the life of your makeup look, it also helps smooth texture to create an even canvas. 
A Caucasian Mary Kay model with half pink, half blonde hair looks confidently at the camera with her hands under her chin.

Tip #2: Apply Concealer AFTER Foundation

You may have heard conflicting advice about this, but we’re here to set the record straight: Concealer comes after foundation. Why? A light layer of foundation can do the heavy lifting to even out your skin tone, and applying concealer after foundation leaves room for Tip #5! Apply colour corrector (stay tuned, we’re getting to that) and concealer as a next step to trouble spot or provide extra coverage where needed. 
An open tube of Mary Kay Undereye Corrector is photographed alongside its doe-foot applicator and a cream color makeup brush and atop a product smear in front of a two-toned pink background.

Tip #3: Brighten, THEN Conceal Undereye Circles

Let’s get real: Undereye circles can be so hard to deal with. Especially for those of us with hereditary circles – no matter how much sleep we get, we wake up to moody crescents – or who are prone to hyperpigmentation when even the slightest eye rub makes the darkness more intense. If you’re tired of hearing the dreadful, not to mention unsolicited “you look tired” comment from well-meaning friends and family, you know the struggle is real. Enter colour corrector and concealer to help lighten the load.

Colour correcting is different from concealing. It combines art and science to neutralize dark circles. A little colour theory 101: In order to cancel out one colour, you have to cover it with the opposite colour on the colour wheel. Since dark circles have blue tones, you want to find the colour opposite blue on the colour wheel, which is orange or peach.

Dab a peach-toned Colour Corrector right where you want it, then gently blend using a Cream Color Brush or the pointed end of a damp Blending Sponge for precise application and to prevent tugging on your delicate skin. Start with three to five dots, and then if you need to add more, do that. Adding product is a lot easier than removing it. Let the corrector dry for a few seconds before moving to the next step.

Now we need to match the undereye area to the rest of your skin. Add a layer of Perfecting Concealer in your shade, or for a brightened effect, try a shade or two lighter than your skin tone. Use gentle sweeping motions with the flat side of the brush or your ring finger to blend everything out. Why use your ring finger? Because it’s your weakest finger, it will keep you from applying too much pressure. Don’t rub, as that can remove product. Add another layer of product, if needed. And try this concealer tip: Start where your dark circle begins, at the inner corner, then travel outward adding a light layer of concealer wherever the darkness continues. You might also want to dab a bit at the outer corner to brighten and visually lift the area. Then blend, blend, blend!

Let the concealer dry, ensuring the edges are blended for a smooth, seamless finish. Bonus: this formula’s light-diffusing technology helps blur the appearance of fine lines and optically corrects imperfections.

Note: If your skin tone is medium-dark to dark, and the Colour Corrector shades seem a bit too light, try using a deep bronze concealer first to neutralize the area in place of the corrector, then use a light bronze shade on top.
An open jar of pink Mary Kay Hydrogel Eye Patches is photographed alongside a group of ice cubes in front of a pink background.

Tip #4: Go Easy on Undereye Bags

If you’re dealing with dark undereye circles and undereye puffiness, you’ll need to treat the area before applying any makeup – simply adding concealer will only highlight the swollen skin. Start by hydrating, soothing and depuffing with cooling eye patches. Store them in your refrigerator to make them feel even cooler. Once you’ve calmed the area as much as possible, apply an eye primer and then makeup to brighten any darkness.
An open jar of Mary Kay Translucent Loose Powder is photographed with powder spilling out alongside an all-over powder makeup brush in front of a two-toned pink background.

Tip #5: Set Your Concealer

Once your concealer is fully blended, set your look by dusting on a light layer of Translucent Loose Powder with an All-Over Powder Brush. Gently dip the brush into the powder, tap off any excess, and pat it right where you need it.

Or, for extra staying power, use a Blending Sponge to add a thicker layer of powder and then “bake”; i.e., let the powder set for 5 to 10 minutes. Once you’re fully baked, dust off the excess powder with the powder brush.
A jar of Mary Kay Silky Setting Powder sits atop smears of beige face powder and next to an all-over powder makeup brush in front of a pink and white background

Tip #6: Conceal Pimples, Scars and Discoloration

You’ll want to grab another tube of concealer, this time in a shade that matches your skin tone, to cover blemishes, redness, marks or dark spots. Apply it using the product’s doe-foot applicator, and gently dab with your ring finger to blend. A couple of taps should do it; anything more and you’ll end up removing the product and having to start all over again. Extra credit: If you’re concealing a large pimple or mark, use a fine-tip brush  so the surrounding edges of the concealer blend in with your skin. Create a full-on flawless finish – and help keep your concealer in place – by dusting on a light layer of setting powder in a skin tone-matching shade. Using a large, fluffy brush, begin at the center of your face, and sweep outward, blending well.
A brunette Latina model smiles while holding a Mary Kay makeup brush in front of her face.

Tip #7: Think Outside the Box

We said it before, but it’s worth repeating: Concealer is truly one of the most versatile and valuable products you can own. Here are some other surprising benefits:

• It sharpens your lip look: If you’re rocking a bold shade, apply around the edges of your lips to make your look really pop and cover any wayward color.
• It stands in for primer: If you’re squeezing out the last of your primer, concealer works as an awesome backup. Simply pat on your eyelids, and blend in before applying eye shadow. 
• It offers a natural-looking highlight: Want to brighten up some areas of your face without adding any shimmer? A lighter shade of concealer doubles as a highlighter for your cheekbones, forehead, bridge of your nose and brow bones.